- Sort Score
- Result 10 results
- Languages All
Results 1 - 10 of 27 for IsSystem (0.45 sec)
-
okhttp-tls/README.md
Call call = client.newCall(new Request.Builder()
    .url(server.url("/"))
    .build());
Response response = call.execute();
System.out.println(response.handshake().peerPrincipal());
RecordedRequest recordedRequest = server.takeRequest();
System.out.println(recordedRequest.getHandshake().peerPrincipal());
```

This handshake is successful because each party has prearranged to trust the root certificate that
Plain Text - Registered: Fri Apr 26 11:42:10 GMT 2024 - Last Modified: Sun Dec 17 15:34:10 GMT 2023 - 9.1K bytes - Viewed (1) -
docs/bucket/versioning/README.md
        System.out.println("my-bucketname is created successfully");
      }

      boolean isVersioningEnabled =
          minioClient.isVersioningEnabled(
              IsVersioningEnabledArgs.builder().bucket("my-bucketname").build());
      if (isVersioningEnabled) {
        System.out.println("Bucket versioning is enabled");
      } else {
        System.out.println("Bucket versioning is disabled");
Plain Text - Registered: Sun Apr 28 19:28:10 GMT 2024 - Last Modified: Thu May 04 21:43:52 GMT 2023 - 11.9K bytes - Viewed (1) -
docs/bucket/notifications/README.md
## Publish MinIO events via AMQP

Install RabbitMQ from [here](https://www.rabbitmq.com/).

### Step 1: Add AMQP endpoint to MinIO

The AMQP configuration is located under the sub-system `notify_amqp` top-level key. Create a configuration key-value pair here for your AMQP instance. The key is a name for your AMQP endpoint, and the value is a collection of key-value parameters described in the table below.

```
KEY:
Plain Text - Registered: Sun Apr 28 19:28:10 GMT 2024 - Last Modified: Thu Jan 18 07:03:17 GMT 2024 - 84K bytes - Viewed (2) -
manifests/charts/README.md
and understand each binary that gets deployed, and select which combination to use.

Note: each component can be installed in parallel with an existing Istio 1.0 or 1.1 installation in
`istio-system`. The new components will not interfere with existing apps, but can interoperate,
and it is possible to gradually move apps from Istio 1.0/1.1 to the new environments and
across environments ( for example canary -> prod )
Plain Text - Registered: Wed Apr 24 22:53:08 GMT 2024 - Last Modified: Wed Feb 07 17:53:24 GMT 2024 - 6.7K bytes - Viewed (0) -
regression-test/README.md
1. Add an Emulator named `pixel5`, if you don't already have one

```
$ sdkmanager --install "system-images;android-29;google_apis;x86"
$ echo "no" | avdmanager --verbose create avd --force --name "pixel5" --device "pixel" --package "system-images;android-29;google_apis;x86" --tag "google_apis" --abi "x86"
```

2. Run an Emulator using Android Studio or from command line.

```
Plain Text - Registered: Fri Apr 26 11:42:10 GMT 2024 - Last Modified: Fri Nov 13 07:09:56 GMT 2020 - 2.5K bytes - Viewed (0) -
operator/README.md
kubectl create ns istio-system
kubectl apply -f operator/samples/default-install.yaml
```

This installs the controller into the cluster in the istio-operator namespace. The controller in turns installs
the Istio control plane into the istio-system namespace by default.

### Controller (running locally)
Plain Text - Registered: Wed Mar 20 22:53:08 GMT 2024 - Last Modified: Sun Sep 17 08:27:52 GMT 2023 - 17.5K bytes - Viewed (0) -
README.md
```sh
minio.exe server D:\
```
Plain Text - Registered: Sun Apr 28 19:28:10 GMT 2024 - Last Modified: Wed Feb 14 17:51:34 GMT 2024 - 18.7K bytes - Viewed (0) -
docs/bucket/replication/README.md
To perform bi-directional replication, repeat the above process on the target site - this time setting the source bucket as the replication target. It is recommended that replication be run in a system with at least two CPU's available to the process, so that replication can run in its own thread. 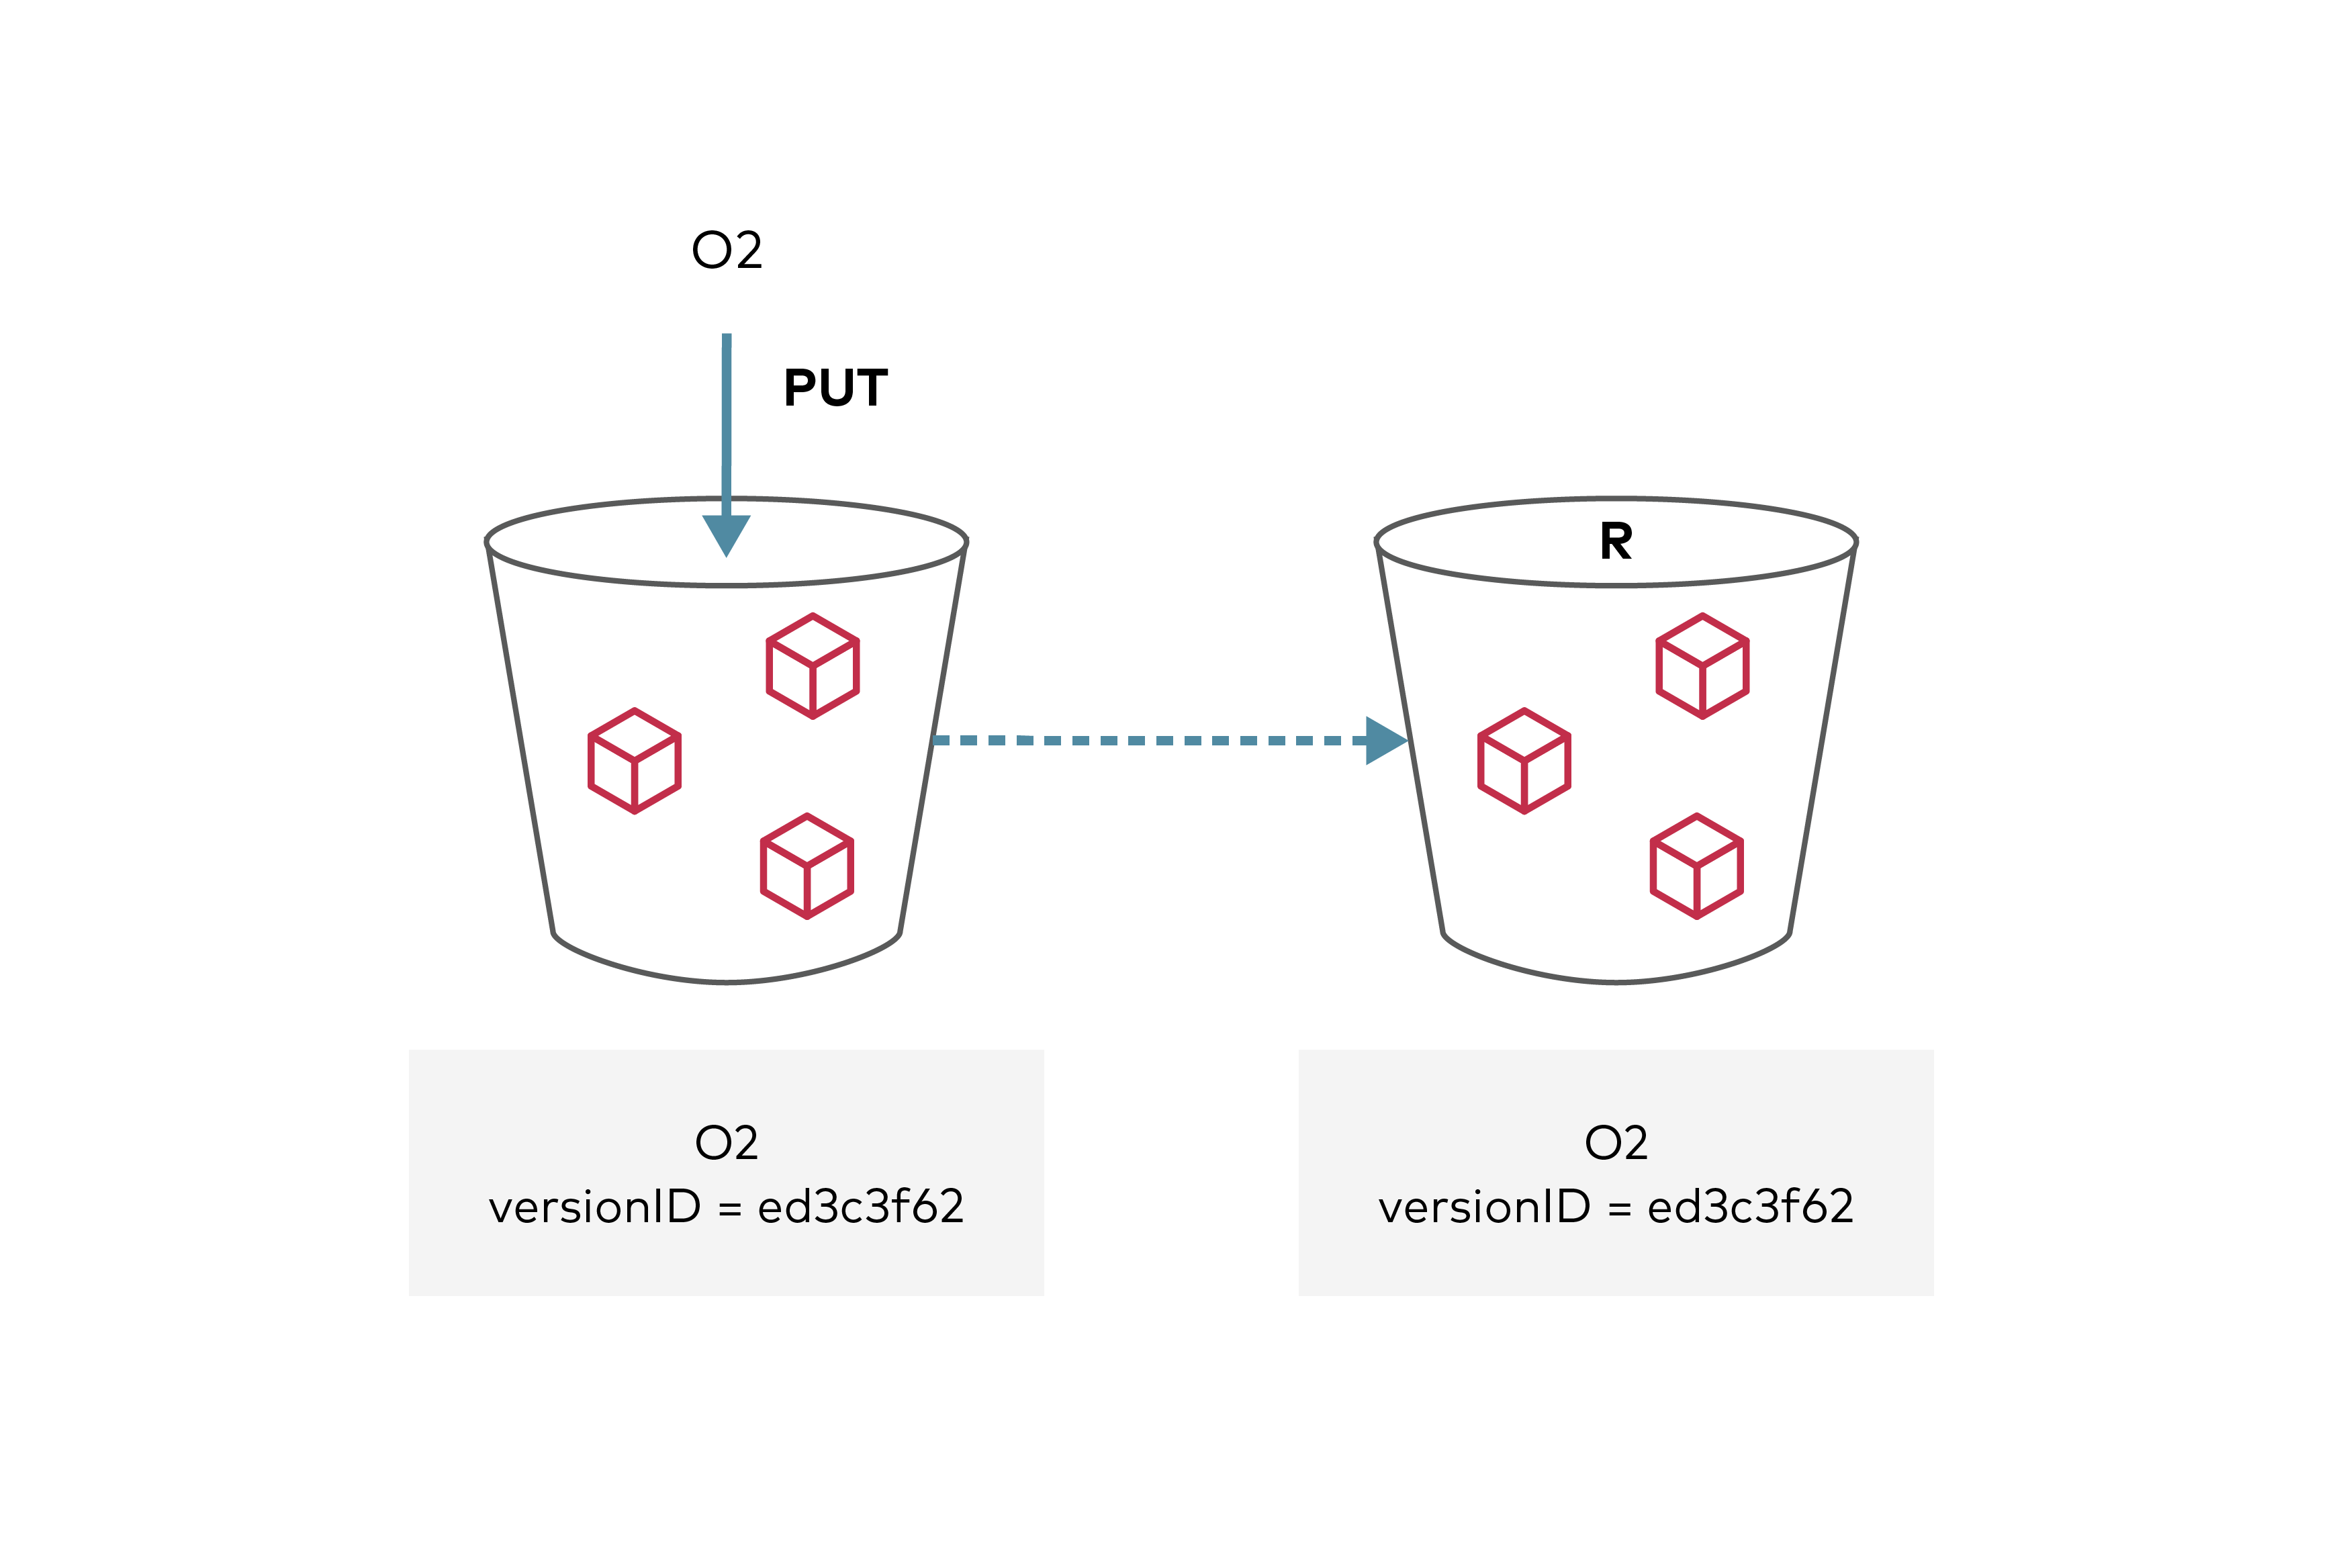
Plain Text - Registered: Sun Apr 28 19:28:10 GMT 2024 - Last Modified: Tue Jan 24 23:46:33 GMT 2023 - 18.2K bytes - Viewed (0) -
docs/config/README.md
```

> NOTE: if you set any of the following sub-system configuration using ENVs, dynamic behavior is not supported.

### Usage scanner
Plain Text - Registered: Sun Apr 28 19:28:10 GMT 2024 - Last Modified: Mon Sep 11 21:48:54 GMT 2023 - 17.7K bytes - Viewed (0) -
android-test/README.md
1. Add an Emulator named `pixel5`, if you don't already have one

```
$ sdkmanager --install "system-images;android-29;google_apis;x86"
$ echo "no" | avdmanager --verbose create avd --force --name "pixel5" --device "pixel" --package "system-images;android-29;google_apis;x86" --tag "google_apis" --abi "x86"
```

2. Run an Emulator using Android Studio or from command line.

```
Plain Text - Registered: Fri Apr 26 11:42:10 GMT 2024 - Last Modified: Tue Feb 14 08:26:50 GMT 2023 - 2.5K bytes - Viewed (0)