- Sort Score
- Num 10 results
- Language All
Results 311 - 320 of 683 for instala (0.07 seconds)
-
.github/workflows/sponsors.yml
      - name: Setup uv
        uses: astral-sh/setup-uv@v7
        with:
          enable-cache: true
          cache-dependency-glob: |
            pyproject.toml
            uv.lock
      - name: Install Dependencies
        run: uv sync --locked --no-dev --group github-actions
      # Allow debugging with tmate
      - name: Setup tmate session
        uses: mxschmitt/action-tmate@v3
Created: Sun Apr 05 07:19:11 GMT 2026 - Last Modified: Sat Jan 10 22:02:57 GMT 2026 - 1.4K bytes - Click Count (0) -
benchmarks/README.md
## Disassembling

NOTE: Linux only. Sorry Mac and Windows.

Disassembling is fun! Maybe not always useful, but always fun! Generally, you'll want to install `perf` and FCML's `hsdis`.
`perf` is generally available via `apg-get install perf` or `pacman -S perf`. FCML is a little more involved. This worked
on 2020-08-01:

```
wget https://github.com/swojtasiak/fcml-lib/releases/download/v1.2.2/fcml-1.2.2.tar.gz
Created: Wed Apr 08 16:19:15 GMT 2026 - Last Modified: Mon May 03 15:30:50 GMT 2021 - 5.9K bytes - Click Count (0) -
docs/ja/docs/deployment/manually.md
## サーバープログラムをインストール { #install-the-server-program }

FastAPI をインストールすると、本番サーバーの Uvicorn が同梱されており、`fastapi run` コマンドで起動できます。

ただし、ASGI サーバーを手動でインストールすることもできます。

[仮想環境](../virtual-environments.md)を作成して有効化し、サーバーアプリケーションをインストールしてください。

例として、Uvicorn をインストールするには:

<div class="termy">

```console
$ pip install "uvicorn[standard]"

---> 100%
```

</div>
Created: Sun Apr 05 07:19:11 GMT 2026 - Last Modified: Fri Mar 20 14:07:17 GMT 2026 - 7.8K bytes - Click Count (0) -
docs/uk/docs/tutorial/testing.md
Переконайтеся, що ви створили [віртуальне середовище](../virtual-environments.md), активували його, а потім встановили `httpx`, наприклад:

```console
$ pip install httpx
```

///

Імпортуйте `TestClient`.

Створіть `TestClient`, передавши йому ваш застосунок **FastAPI**.

Створюйте функції з іменами, що починаються з `test_` (це стандартна угода для `pytest`).
Created: Sun Apr 05 07:19:11 GMT 2026 - Last Modified: Thu Mar 19 18:27:41 GMT 2026 - 8.6K bytes - Click Count (0) -
docs/bucket/quota/README.md
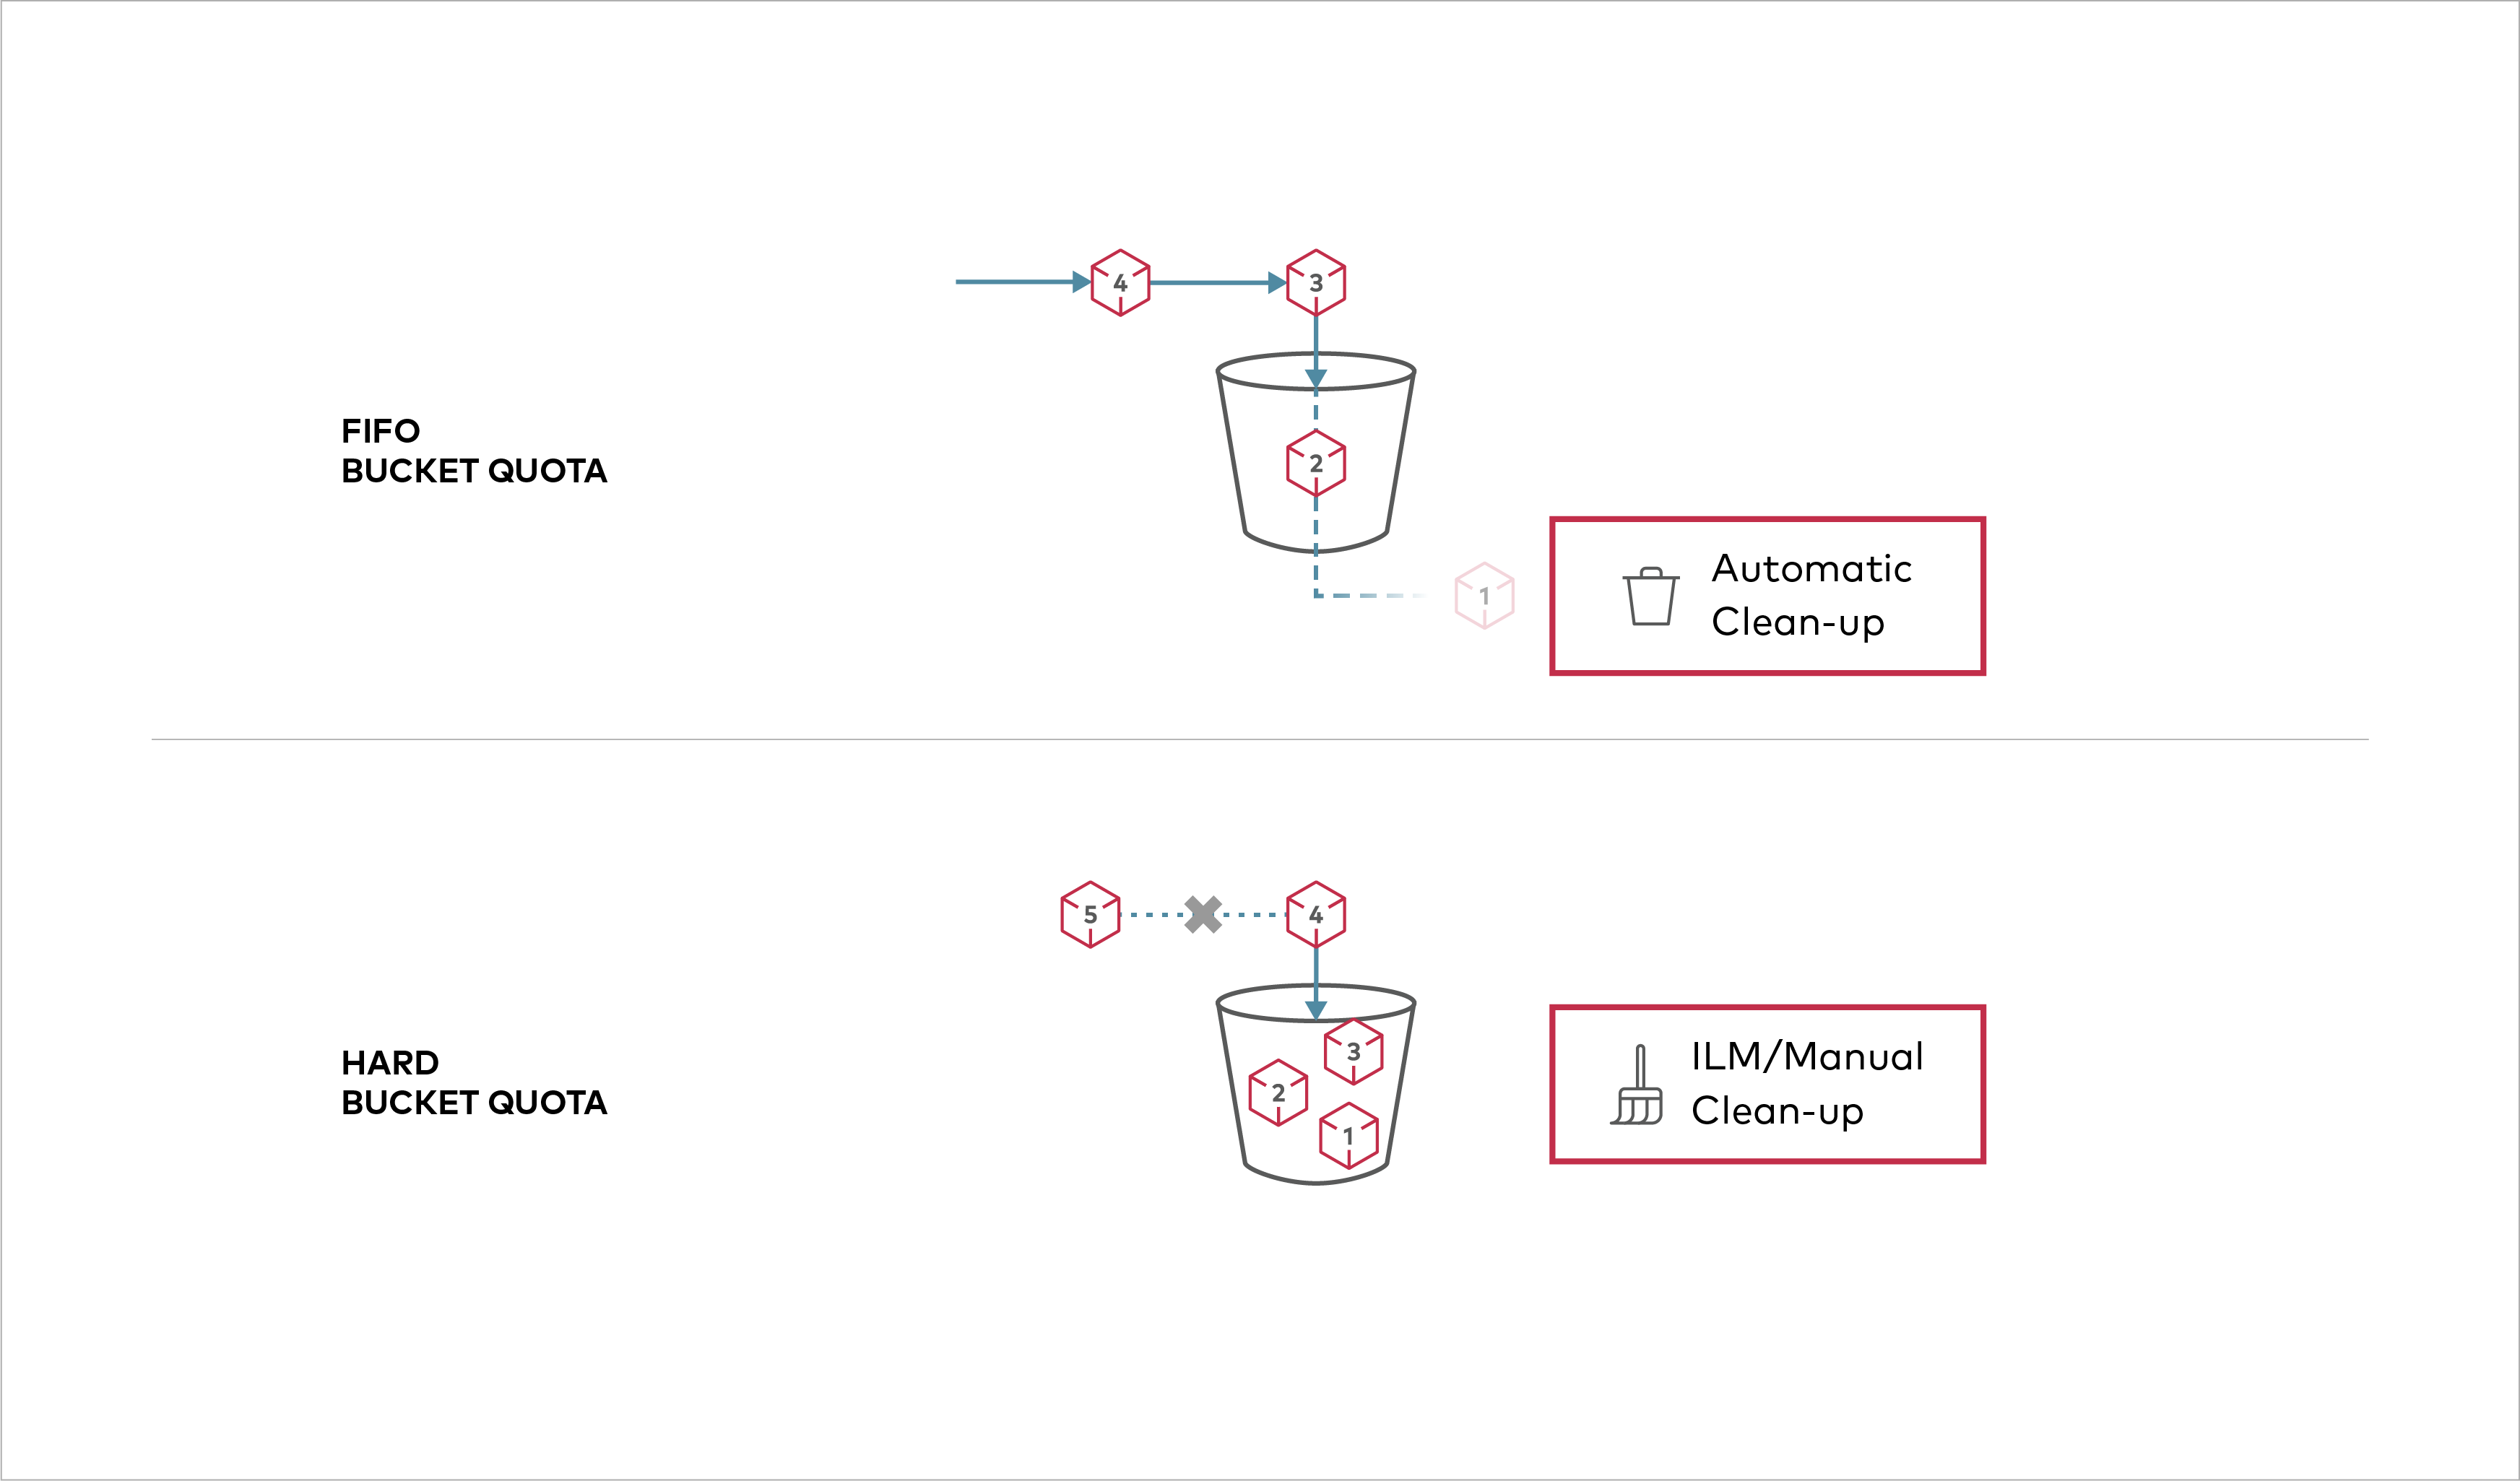 Buckets can be configured to have `Hard` quota - it disallows writes to the bucket after configured quota limit is reached. ## Prerequisites - Install MinIO - [MinIO Quickstart Guide](https://docs.min.io/community/minio-object-store/operations/deployments/baremetal-deploy-minio-on-redhat-linux.html#procedure).
Created: Sun Apr 05 19:28:12 GMT 2026 - Last Modified: Tue Aug 12 18:20:36 GMT 2025 - 1.1K bytes - Click Count (0) -
main.go
//
// You should have received a copy of the GNU Affero General Public License
// along with this program.  If not, see <http://www.gnu.org/licenses/>.

package main // import "github.com/minio/minio"

//go:generate go install tool

import (
	"os"

	// MUST be first import.
	_ "github.com/minio/minio/internal/init"

	minio "github.com/minio/minio/cmd"
)

func main() {
	minio.Main(os.Args)
Created: Sun Apr 05 19:28:12 GMT 2026 - Last Modified: Thu Apr 24 23:34:11 GMT 2025 - 1004 bytes - Click Count (0) -
ci/official/requirements_updater/numpy1_requirements/requirements.in
opt_einsum == 3.3.0
astunparse == 1.6.3
dill == 0.3.7
astor == 0.7.1
typing_extensions ~= 4.14.1
gast == 0.4.0
termcolor == 2.3.0
wrapt == 1.16.0
tblib == 2.0.0
ml_dtypes >= 0.5.1, < 0.6.0
auditwheel >= 6.1.0
# Install tensorboard, and keras
# Note that here we want the latest version that matches TF major.minor version
# Note that we must use nightly here as these are used in nightly jobs
# For release jobs, we will pin these on the release branch
Created: Tue Apr 07 12:39:13 GMT 2026 - Last Modified: Mon Jan 26 22:44:40 GMT 2026 - 1.2K bytes - Click Count (0) -
docs/en/docs/tutorial/response-model.md
/// info

To use `EmailStr`, first install [`email-validator`](https://github.com/JoshData/python-email-validator).

Make sure you create a [virtual environment](../virtual-environments.md), activate it, and then install it, for example:

```console
$ pip install email-validator
```

or with:

```console
$ pip install "pydantic[email]"
```

///
Created: Sun Apr 05 07:19:11 GMT 2026 - Last Modified: Thu Mar 05 18:13:19 GMT 2026 - 15.5K bytes - Click Count (0) -
impl/maven-core/lifecycle-executor.txt
        <test>org.apache.maven.plugins:maven-surefire-plugin:test</test>
        <package>org.apache.maven.plugins:maven-jar-plugin:jar</package>
        <install>org.apache.maven.plugins:maven-install-plugin:install</install>
        <deploy>org.apache.maven.plugins:maven-deploy-plugin:deploy</deploy>
      </phases>
    </lifecycle>
  </lifecycles>
</configuration>
Created: Sun Apr 05 03:35:12 GMT 2026 - Last Modified: Fri Oct 25 12:31:46 GMT 2024 - 9.7K bytes - Click Count (0) -
docs/tr/docs/advanced/wsgi.md
## `WSGIMiddleware` Kullanımı { #using-wsgimiddleware }

/// info

Bunun için `a2wsgi` kurulmalıdır; örneğin `pip install a2wsgi` ile.

///

`WSGIMiddleware`'ı `a2wsgi` paketinden import etmeniz gerekir.

Ardından WSGI (örn. Flask) uygulamasını middleware ile sarmalayın.

Ve sonra bunu bir path'in altına mount edin.
Created: Sun Apr 05 07:19:11 GMT 2026 - Last Modified: Fri Mar 20 07:53:17 GMT 2026 - 1.7K bytes - Click Count (0)